The Best Graham Cracker Crust Recipe
I’m thrilled you’re here to make a delicious and easy graham cracker crust with me today! This quick, simple recipe is the best graham cracker crust recipe. Far better than any store-bought option. With just a little time and effort, you’ll see it’s totally worth it!
Watch the tutorial below to find out more or if watching isn’t your thing, keep reading for step by step instructions.
In this post, I’ll be using butter, but feel free to substitute with margarine—I use both regularly. When using margarine, I like to add a bit of extra salt to make up for the salt that’s already present in salted butter.
I recommend using a kitchen scale to weigh your ingredients for accuracy.
I start by turning on my scale. When you turn on your scale with nothing on it, it will read zero on the screen. When you place a container on it, you will need to zero or tare the scale so that you don’t have to do the math when you add your ingredients. So, I place the container on the scale, press the tare or zero button and then wait for the scale to read zero again.
Melt Butter
Now I can add my butter to measure it. I weigh my butter in a microwave safe bowl and stick it in the microwave to melt.
While that is melting, I am going to weigh and combine the other ingredients. Once again, take the container, put it on the scale, I zero it out so I don’t have to do the math. I am going to add my graham cracker crumbs first.
But first, let’s talk about graham cracker crumbs for the best graham cracker crust recipe
Different brands can have varying moisture content, which can sometimes lead to inconsistent results. Even though graham cracker crusts are usually simple to make, these differences can cause frustration when your recipe doesn’t turn out quite right.
So, I suggest starting with the graham cracker recipe that I provide.
If your mixture feels too dry, simply add a little more butter at the end. Don’t worry—I’ll show you exactly how the mixture should look and feel so you’ll know if adjustments are needed.
Just remember that moisture content can differ between brands. Now that we’ve covered the details about the crumbs, let’s get back to making the best graham cracker crust!
Graham Cracker Crumb Options
If you don’t want to buy graham cracker crumbs to make the graham cracker crust, you can also buy plain graham crackers and make them into crumbs. In order to do this, you will get your graham cracker sheets, set them on the scale and weigh the proper amount you need for your recipe. After you weigh them out, you can put them into a blender or food processor and let it chop until you have fine crumbs.
Add Graham Cracker Crumbs to container
Now you are going to Add your graham cracker crumbs to the container on the scale. After I have added the graham cracker crumbs to the container, I zero out the scale with the container again so I don’t have to do the math with the other ingredients.
Now add your sugar on top of the graham crumbs. At this point if I was using margarine instead of butter, I would add the salt to the mixture.
Mix
You should have all the dry ingredients in the same container and now you are going to mix it together. I like to use a disposable glove and mix it with my hand so I can get in all the corners of the container but you can use a spoon if you prefer. I also like using a clear container so I can see if there is any of the mixture that gathers in the corners.
Add Melted Butter
Once you have all the dry ingredients mixed together, your butter should be melted. Depending on how cold your butter is, will depend on how long you microwave it for but it only usually takes 30-45 seconds.
Take the butter and pour it in the dry mixture all at one time, getting as much of the butter out of the container that you can. You will probably have a little residue left in your butter container and that is okay.
Mix…again
Now that you have added the butter, the next step is to mix it all together. Once again I use a disposable glove on my hand and mix it. I like to do this so I can really feel the texture and make sure the moisture is all distributed evenly. I will squeeze it through my hands, mixing it all together and making sure the corners are mixed in as well.
Check the consistency for the best graham cracker crust
Once I feel like it is all mixed and moistened, I always check the consistency. I do this by getting some of the mixture in my hand and squeezing it together until it holds it shape. Then I open my palm and touch the clump I made.
If I touch it gently and it crumbles apart, I either need to mix it more or add more butter. On the flip side, I don’t want the clump when I squeeze it to have liquid seeping out of it. That would mean there is too much moisture in the mixture and can add about a tablespoon of graham mixture. If you think there is not enough moisture in the graham mixture, you can add another tablespoon of melted butter and see if this gets you to the right consistency.
A word on pie tins
When your mixture is the right consistency, it is ready to go in the pie tins.
There are tons of different styles of pie tins. Here are two different techniques to use, depending on the type of pie dish. I’ll demonstrate each one for you!
I always use my favorite pie tin from Handi-foil, a reusable, disposable-style 9-inch tin that I’ve relied on for years. I use it all the time for baking!
The other technique I will show you is with a classic pie dish. It seems like it is a little deeper and has steeper sidewalls. Using one of these techniques, you should be able to use your favorite pie dish.
1st Technique to make the best graham cracker crust recipe
Let’s start by putting your pie tin or dish on the scale. You will want to zero or tare the scale. In my 9 inch pans I put 10-11 oz of graham mixture in the pie tin/dish. The first way I’ll show you is my favorite, it is really easy, and is done in the pie tin. The only downside is you need 2 of the same tins to do this technique. I always just keep one of these pie tins around so I can use them for this purpose.
Move the crumbs to the outside of the tin
Now, I am going to take my hand and move the crumbs to the outside of the tin. I leave just enough in the middle to have the whole bottom covered. Now I take the matching pie tin that has nothing in it and I place it on top of the pie mixture. I am going to press the tin down into the mixture and push the sides and bottom.
This will press the mixture together and then you can pull the tin out.
When you take the tin out, you will see that there is excess mixture that gets stuck in the bottom edge. I solve this issue by taking my fingers and pushing them into the bottom corner of the pan. The mixture will push toward the top of the tin and may spill out if not controlled. Use your other hand to hold the mixture in the bowl and keep it in place.
Once I have pushed in all the corners and moved all the way around the tin, I take the matching tin (with no filling) and push it into the pan, on top of the mixture again.
This time I really push the bottom and the squeeze the sides to help the pie crust mold together. If the top of your pie tin is flexible, I push the top of the pie tin all the way around the pie tin as well to help shape the edge. When I am finished pressing all around the tin, I carefully remove the top tin from the crust. You should now have a beautifully molded crust.
2nd Technique to make the best graham cracker crust recipe
The 2nd technique is made in a pie dish. I would start out by doing the same thing and moving the crumbs to the outside edge and leaving just enough on the bottom to cover it. Next I push the edges into the corners and press the crumbs on the bottom.
Now, I take a flat surface, I like to use a measuring cup and push crumbs with the flat side on the bottom of the pan to bind the crumbs together.
After pushing on the bottom, I move to the sidewalls by using the side of the measuring cup and almost rolling it back and forth on the sidewall to compress and mold the sides.
Place your other hand on the outside of the pan to catch the excess crumbs.
I almost use a rocking motion when pressing on the sides. Press firmly around the entire dish until all the sides are fully compressed together.
Form the top edge
Next I form the top edge with one hand on the inside of the dish and the other hand on the outside and squeeze the edge together with my fingers. It won’t be super compact and that is okay, we just want to form a nice looking edge so the crust doesn’t just crumble away.
Your crust should now look finished and is ready to be filled or baked.
To bake… or not to bake?
You now have your crusts that are all shaped but will be really fragile until you bake or freeze them. Now, to bake, or not to bake is the question. After doing experiments, at room temperature, the baked crust holds up better than the unbaked.
I always bake the crust right away unless I am planning on using the crust for an ice cream pie or something that is going to be in the freezer and served cold. Or, if I fill the pie with something that needs to be cooked (ie cheesecake or key lime pie). When you bake the crust you only need to bake it for a few minutes on a lower temperature oven. I bake my crusts for 5 min in a 300 degree oven.
These two techniques are easy and fast and both produce a great pie crust. Until next time, go experiment in your kitchen.
xoxo
Krissy
Print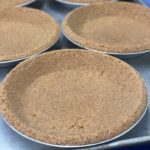
The Best Graham Cracker Crust Recipe
Description
Be sure to watch the how to video included for step by step instructions!
Ingredients
5 oz graham cracker crumbs (1 1/4 cups)
3 oz sugar (7 TBSP)
3 oz butter *or margarine but see notes (6 TBSP)
Salt (if using Margarine)
Instructions
Step 1: Choose Butter or Margarine
- Use butter for this recipe, or substitute margarine if preferred.
- When using margarine, add a bit of extra salt to compensate for the salt found in butter.
Step 2: Weigh Your Ingredients
- Use a kitchen scale for accurate measurements.
- Turn on the scale, place a container on it, and press the tare or zero button to eliminate the container’s weight.
Step 3: Melt the Butter
- Weigh your butter in a microwave-safe bowl and microwave until melted, typically 30-45 seconds.
Step 4: Weigh and Add Graham Cracker Crumbs
- Place a container on the scale, tare it, and add your graham cracker crumbs.
- Consider that different brands of graham crackers may have varying moisture content, which can affect your recipe.
Step 5: Optional: Make Your Own Graham Cracker Crumbs
- Weigh out graham crackers, then blend or process them into fine crumbs if you’re not using pre-made crumbs.
Step 6: Add Sugar and Salt
- After adding graham cracker crumbs, tare the scale again and add sugar.
- If using margarine, also add salt.
Step 7: Mix the Dry Ingredients
- Combine the crumbs, sugar, and (if using salt).
- Mix thoroughly using your hands (wear gloves) or a spoon, ensuring everything is well-blended, especially in the corners of the container.
Step 8: Add Melted Butter
- Pour the melted butter into the dry mixture all at once.
- Mix everything together using your hands to ensure the moisture is evenly distributed.
Step 9: Check Consistency
- Squeeze a handful of the mixture to check if it holds its shape.
- If it crumbles, mix more or add a tablespoon of butter. If too moist, add a tablespoon of graham cracker crumbs.
Step 10: Choose Your Pie Tin
- Use either a Handi-foil reusable pie tin or a traditional pie dish.
- Depending on the type, use different techniques to shape the crust.
Step 11: First Technique for Pie Tin
- Move crumbs to the sides of the tin, leaving just enough to cover the bottom.
- Press a matching pie tin into the mixture to shape the crust.
- Remove the top tin, press the crumbs into the corners with your fingers, and re-press with the empty tin to finish molding.
Step 12: Second Technique for Pie Dish
- Move crumbs to the sides and press the bottom firmly with a flat surface like a measuring cup.
- Roll the measuring cup along the sidewalls to compress the crust, using a rocking motion to press evenly.
- Form the top edge by pinching the crust between your fingers.
Step 13: Bake or Freeze the Crust
- For a sturdier crust, bake for 5 minutes at 300°F.
- For ice cream pies or frozen desserts, skip baking and freeze the crust instead.
Notes
- When using margarine, add a 1/4 tsp salt for flavor.