Description
Be sure to watch the how to video included for step by step instructions!
Ingredients
Scale
5 oz graham cracker crumbs (1 1/4 cups)
3 oz sugar (7 TBSP)
3 oz butter *or margarine but see notes (6 TBSP)
Salt (if using Margarine)
Instructions
Step 1: Choose Butter or Margarine
- Use butter for this recipe, or substitute margarine if preferred.
- When using margarine, add a bit of extra salt to compensate for the salt found in butter.
Step 2: Weigh Your Ingredients
- Use a kitchen scale for accurate measurements.
- Turn on the scale, place a container on it, and press the tare or zero button to eliminate the container’s weight.
Step 3: Melt the Butter
- Weigh your butter in a microwave-safe bowl and microwave until melted, typically 30-45 seconds.
Step 4: Weigh and Add Graham Cracker Crumbs
- Place a container on the scale, tare it, and add your graham cracker crumbs.
- Consider that different brands of graham crackers may have varying moisture content, which can affect your recipe.
Step 5: Optional: Make Your Own Graham Cracker Crumbs
- Weigh out graham crackers, then blend or process them into fine crumbs if you’re not using pre-made crumbs.
Step 6: Add Sugar and Salt
- After adding graham cracker crumbs, tare the scale again and add sugar.
- If using margarine, also add salt.
Step 7: Mix the Dry Ingredients
- Combine the crumbs, sugar, and (if using salt).
- Mix thoroughly using your hands (wear gloves) or a spoon, ensuring everything is well-blended, especially in the corners of the container.
Step 8: Add Melted Butter
- Pour the melted butter into the dry mixture all at once.
- Mix everything together using your hands to ensure the moisture is evenly distributed.
Step 9: Check Consistency
- Squeeze a handful of the mixture to check if it holds its shape.
- If it crumbles, mix more or add a tablespoon of butter. If too moist, add a tablespoon of graham cracker crumbs.
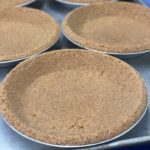
Step 10: Choose Your Pie Tin
- Use either a Handi-foil reusable pie tin or a traditional pie dish.
- Depending on the type, use different techniques to shape the crust.
Step 11: First Technique for Pie Tin
- Move crumbs to the sides of the tin, leaving just enough to cover the bottom.
- Press a matching pie tin into the mixture to shape the crust.
- Remove the top tin, press the crumbs into the corners with your fingers, and re-press with the empty tin to finish molding.
Step 12: Second Technique for Pie Dish
- Move crumbs to the sides and press the bottom firmly with a flat surface like a measuring cup.
- Roll the measuring cup along the sidewalls to compress the crust, using a rocking motion to press evenly.
- Form the top edge by pinching the crust between your fingers.
Step 13: Bake or Freeze the Crust
- For a sturdier crust, bake for 5 minutes at 300°F.
- For ice cream pies or frozen desserts, skip baking and freeze the crust instead.
Notes
- When using margarine, add a 1/4 tsp salt for flavor.