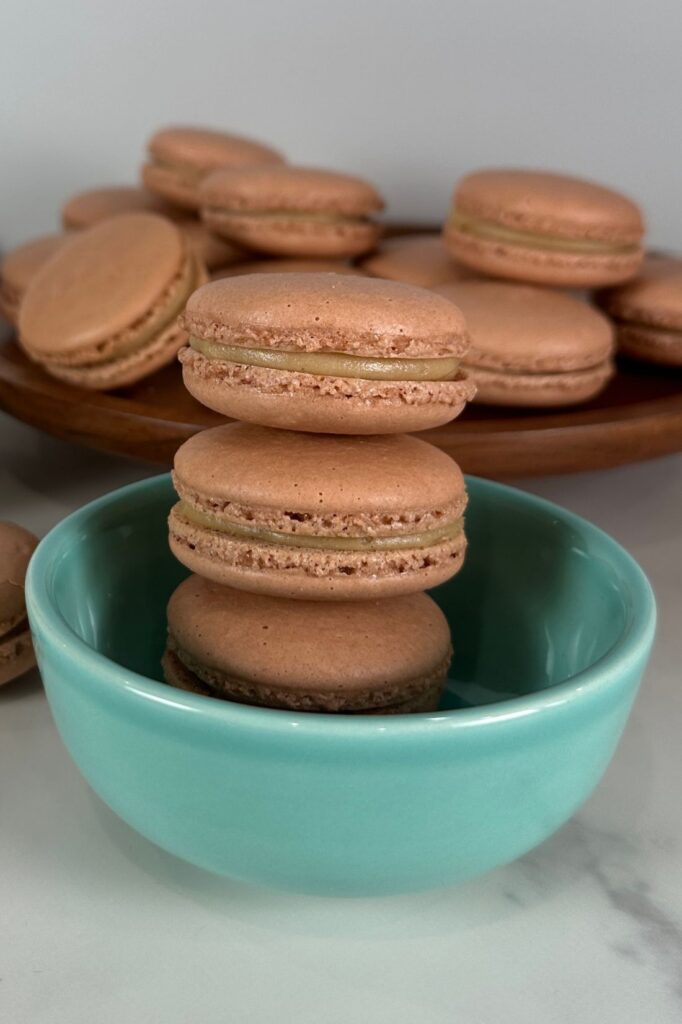
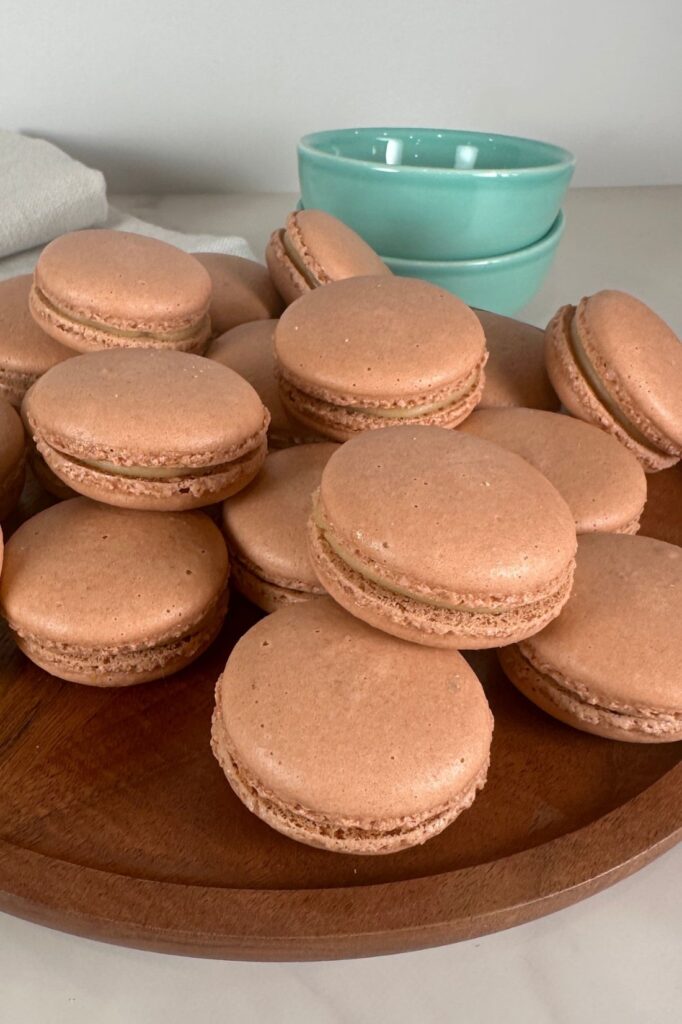
Salted Caramel Macarons Recipe
There’s something magical about biting into a perfectly crisp, chewy macaron—especially when it’s filled with buttery, rich salted caramel. It’s one of the most popular macaron flavors out there, and I totally get why. It’s decadent, sweet with a little salty kick, and absolutely worth the effort. This Salted Caramel Macarons Recipe will not disappoint!
If you’ve never made caramel sauce (or macarons!), I’ve got you. With the right tools and these step-by-step instructions, you’ll be filling and stacking these beauties with confidence in no time.
Why You’ll Love This Salted Caramel Macarons Recipe
- Classic French flavor with a sweet-salty twist
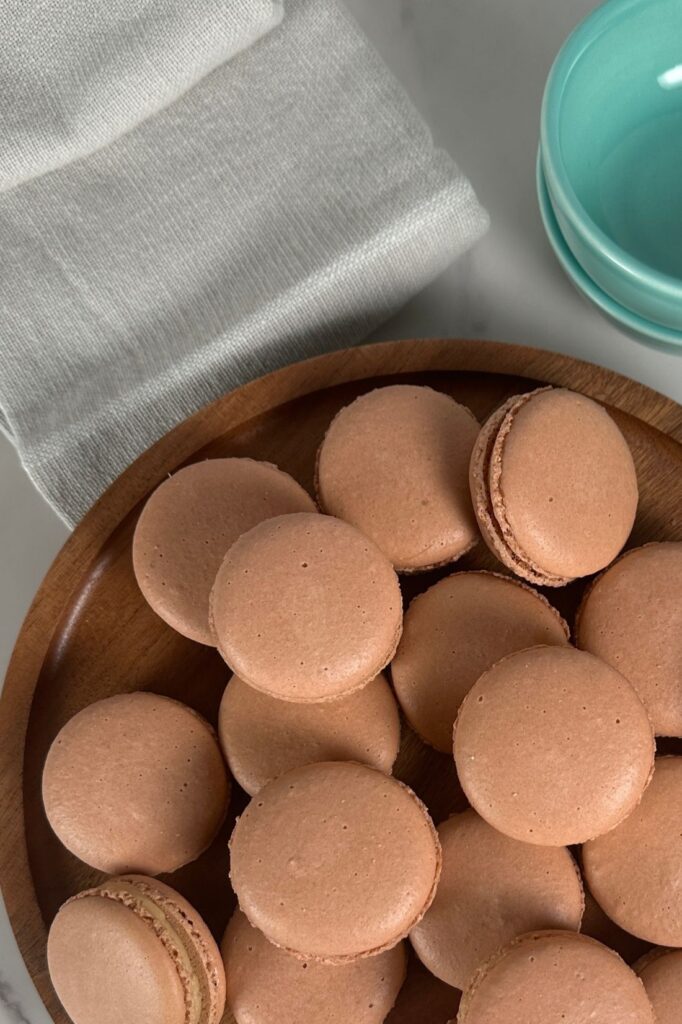
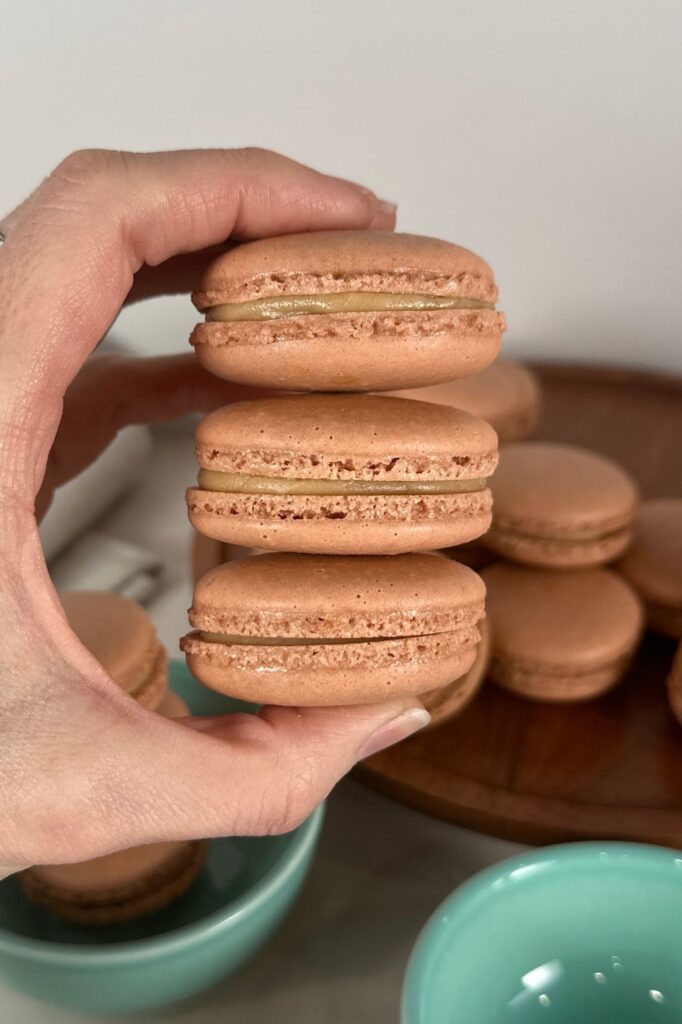
- Perfect texture: crisp shell, chewy center, creamy filling
- Made with a thicker homemade caramel that won’t ooze out
- Filled with both buttercream and caramel
- Foolproof guide—even for beginners
- Make-ahead friendly & freezer-friendly!
Whether you’re making macarons for the first time or looking to perfect your technique, these deliver bakery-worthy results every time.
Make the Filling First
Always make your fillings first—this will make your life so much easier! You want everything cooled and ready to go by the time your salted caramel macaron shells are done.
- Salted caramel sauce – thick, buttery, and stable
- Salted caramel buttercream – light, fluffy, pipe-able
Salted Caramel Sauce
Ingredients
- 227 g (1 cup / 8 oz) water
- 490 g (2¼ cups / 17.25 oz) granulated sugar
- 1 Tbsp light corn syrup
- 454 g (2 cups / 16 oz) heavy cream, warmed
- 1 tsp vanilla bean paste
- 2 tsp sea salt
Instructions
- Combine sugar, water, and corn syrup in a saucepan. Don’t stir.
- Cover and heat over medium. Once boiling, remove the lid.
- Cook until amber-colored and carefully add warm cream.
- Stir in salt with cream, then remove from heat and add vanilla.
- Let cool completely before using.
Tips for Perfect Caramel Sauce
- Use a heavy-bottomed stainless steel saucepan with a lid.
A lid traps steam early on, which helps dissolve the sugar evenly. I use this Cuisinart one from Target and love it!
- Cover until it boils.
Once the sugar starts bubbling, remove the lid to let moisture escape so the syrup can caramelize properly.
- Don’t stir!
Stirring can cause crystallization. Instead, if one side is cooking faster, gently swirl or rotate the pot.
- Use a digital thermometer.
I love my Thermapen, but even this budget-friendly IKEA thermometer works—just note it might run hotter if it’s sitting on the bottom of the pan. I adjust by a few degrees when using it. I cook my sugar mixture until it reaches 325º-350ºF, which gives a deep amber color and rich caramel flavor.
- Watch for visual (and smell) cues.
As the sugar cooks, it will turn from clear, to pale yellow, to deep amber. The darker it gets, the more rich and complex the caramel flavor will be. But it’s a fine line—once it hits that deep amber, it can go from perfectly caramelized to bitter and burnt in just seconds. Watch it closely.
- Brush down the sides of the pan with water.
Even if you don’t see crystals, this helps prevent any from forming. Just dip a pastry brush in water and run it around the sides.
- Heat your cream before adding.
Cold cream can make the caramel seize and clump. Warm it up gently in a separate pan or microwave until steamy but not boiling.
- Add salt with the cream.
Adding it at this stage helps it dissolve fully into the mixture.
- Add vanilla after removing from heat.
This keeps the flavor fresh and prevents it from burning off.
- Don’t scrape the pan.
When pouring the caramel out, leave the sticky bits behind. Scraping can introduce crystallized sugar into your smooth sauce.
- Let it cool fully before using it in your macarons or buttercream.
Salted Caramel Buttercream
Ingredients
- 227 g (1 cup / 8 oz) unsalted butter, softened
- 454 g (4 cups / 16 oz) powdered sugar
- 454 g (2 cups / 16 oz) thick caramel sauce
Instructions
- Whip butter until smooth and fluffy.
- Alternate powdered sugar and caramel additions.
- Whip until light and creamy.
Tips for Perfect Salted Caramel Buttercream
- Soften your butter slowly.
Leave it on the counter for a few hours, or microwave it on half power in short 10–15 second bursts. Soft, not melted, is the goal.
- Don’t let the butter melt.
You want your butter soft enough that your finger leaves an indentation—but not greasy or liquid. If it’s too cold, your buttercream won’t whip properly and may have small chunks.
- Whip the butter first, on its own.
Use a whisk attachment and beat the butter until it’s smooth and fluffy—or silky, depending on its starting texture. This builds structure and gives you that ultra-creamy, smooth, stable finish.
- Add powdered sugar and caramel in batches.
Alternate between adding the sugar and the caramel. Mixing well between each addition helps everything blend evenly.
- Whip until light and airy.
Once all the ingredients are added, give the buttercream a good long whip. You’re looking for a fluffy, pipeable texture that holds soft peaks.
- Scrape the bowl often.
Stop and scrape the sides and bottom of the bowl frequently. This makes sure everything is fully incorporated and avoids hidden lumps.
Salted Caramel Macaron Shells
Macaron Almond Paste Ingredients
- 250 g almond flour
- 250 g powdered sugar
- 100 g egg whites
Italian Meringue Ingredients
- 250 g granulated sugar
- 75 g water
- 100 g egg whites
- ¼ tsp salt (optional)
Step-by-Step Macaron Shells
Prep Your Tools
Macarons are super sensitive to grease and moisture, so this prep step matters!
- Wipe down all bowls, spatulas, and whisks with white vinegar to remove any traces of fat.
- Sift together 250 g almond flour and 250 g powdered sugar into a large mixing bowl.
- Add 100 g egg whites to the sifted mixture and mix until it forms a smooth paste.
- If you’re coloring your shells, now’s a good time to add gel food coloring. Remember: it will lighten when you add the meringue.
Make the Sugar Syrup
You’re making a hot sugar syrup to cook the egg whites—this is what makes the Italian meringue so stable!
- Combine 250 g sugar and 75 g water in a small saucepan.
- Do not stir—just let the sugar absorb the water.
- Cover with a lid and set over medium heat. Once it begins to boil, remove the lid and insert your thermometer.
- Cook the syrup until it reaches your target temperature. (See temp guide below!)
Adjusting Sugar Syrup Temps for Altitude
When making Italian meringue or any sugar syrup, temperature matters—a lot. But depending on your elevation, sugar reaches those key stages at lower temperatures. This is especially important when you’re heating syrup for your macarons.
I live in Utah (about 4,500 ft above sea level), so I heat my syrup to around 240°F, instead of the standard 248°F used at sea level.
| Elevation | Target Syrup Temp (Soft Ball Stage) |
|---|---|
| Sea level – 2,000 ft | 248°F (120°C) |
| 2,000 – 4,000 ft | 244°F (118°C) |
| 4,000 – 6,000 ft | 240°F (116°C) |
| 6,000 – 8,000 ft | 236°F (113°C) |
| 8,000 ft + | 232°F (111°C) |
Why it Matters
If you don’t adjust, your sugar syrup can cook too far, leading to stiff meringue or grainy results. These few degrees make a big difference!
Temperature Tip
You can test your thermometer by boiling water—at sea level, it should read 212°F (100°C). If it reads lower, you’re likely at a higher elevation and will need to adjust your syrup temps.
Not sure how high up you are? Just Google “What’s my elevation” or “What’s my boiling point.” Easy!
Whip Egg Whites
While your syrup is heating, start whipping 100 g of egg whites in a clean stand mixer bowl.
- Begin on low speed (KitchenAid speed 3–4).
- When your syrup is about 10°F away from your target, increase the mixer to medium-high.
- Whip until you reach soft peaks—they should be flexible and not too stiff.
What are Soft Peaks?
As your egg whites whip, you’ll see a transformation:
- First: large, loose bubbles and a puddle underneath
- Then: the bubbles get smaller and more uniform
- Next: the mixture looks fluffy and holds visible lines (striations)
- Finally: when you lift the whisk, the peak should hold—but the tip gently folds over
If the egg whites start to stick to the side of the bowl and the peak is flexible but not runny or stiff—you’re there!
Krissy’s Tip:
If your syrup isn’t quite ready yet, you can turn the mixer down to low to keep the whites moving. Just don’t stop—if they sit still, they’ll deflate.
Pour Syrup & Whipping the Meringue
Once your syrup hits temperature, it’s time to turn those whites into meringue magic!
- With the mixer running on medium-high, slowly pour the hot syrup down the side of the bowl—avoid the whisk directly.
- Take your time—this could take 1–2 minutes.
- Once it’s all in, continue whipping on medium-high speed.
- The bowl will feel hot at first—that’s normal. Keep whipping until the bowl feels warm (not hot) to the touch.
How to Know When Your Meringue is Ready?
There’s no magic timer here—go by feel, not minutes. I used to think I had to whip for a certain amount of time and always ended up overmixing.
Here’s what to look for:
- The bowl should feel warm, not hot. If it’s still hot, keep whipping.
- The meringue should look glossy, structured, and thick.
- When you swirl the whisk in the bowl and pull it out, the meringue should hold a medium peak: it stands up tall but has a little jiggle or bend at the tip.
Krissy’s Tip:
Give the whisk a wiggle. If the meringue jiggles slightly but holds its shape—it’s perfect. **If it’s droopy or sliding, it needs more time. If it’s clumpy or super stiff, it went too far.
Folding the Meringue (Macaronage)
This step is KEY! Fold gently so you don’t deflate the meringue—but mix enough to get that flowing ribbon texture.
- Start by adding one-third of the meringue to the paste mixture.
Don’t stress about deflating it—this first portion is your “sacrifice mix.”
The textures are really different, so this step just helps them combine more smoothly later. - Next, add another third of the meringue.
This time, fold carefully by scraping along the bottom of the bowl and bringing the mixture up and over.
Rotate the bowl as you go.
Do this folding motion about 5 times. The mixture should start to come together but may still look streaky—totally normal! Fold a couple more times if it’s very separate. - Add the final third of your meringue.
Continue folding gently until your batter is smooth and flows in thick ribbons.
How to Know When Your Batter Is Ready?
This step—called macaronage—takes some feel and practice. Here’s how to tell when your batter is ready to pipe:
- The batter should fall from your spatula in thick ribbons
- You should be able to draw a figure 8 with the batter without it breaking
- The ribbons should slowly melt back into the bowl—not instantly, but within 30–45 seconds
Krissy’s Tip:
I like to slightly undermix, then test by lifting my spatula and doing the figure 8 test. If I can draw 1–1½ loops and the edges of the ribbons softly melt into the batter, I stop folding.
The batter will never fully disappear—and it shouldn’t. If your ribbons completely melt away and the surface looks flat, you’ve mixed too long.
You want to still see where the ribbons folded, but with soft, rounded edges—not sharp or stiff.
It’s always better to stop early and test than to overmix and lose the structure.
Pipe & Rest
- Transfer batter to a piping bag fitted with a #10 or #12 round tip.
- Use a template to pipe even circles on parchment or silicone mat.
- Tap trays firmly on the counter to release air bubbles.
- Let the piped shells rest at room temperature until the tops look matte and dry to the touch. They shouldn’t feel sticky when lightly pressed.
Drying Tips
Drying time can vary a lot depending on your humidity and kitchen conditions.
I live in Utah where it’s pretty dry, so I usually let mine rest for about 30 minutes. If you’re in a humid climate, you may need 45–60 minutes or more. Use the matte finish and no-stick touch as your guide—not the clock!
Baking Your Macarons
You’re almost there! Just a quick bake to finish them off.
- Preheat your oven to 300°F (150°C)—but double check it with an oven thermometer. Macarons are sensitive, and most home ovens aren’t accurate.
- Bake one tray at a time in the center of the oven for about 15 minutes.
- You’ll know the macarons are done when you gently nudge the top of a shell and it doesn’t move side-to-side on its feet.
Krissy’s Baking Tips
- Every oven bakes a little differently—so go by how your macarons behave, not just the number on the dial.
- I set my convection oven to 285°F and my conventional oven to 290°F, but they both actually bake just under 300°F based on my thermometer.
- Adjust your temp based on how your shells rise and finish—and always test a thermometer inside your oven, not just rely on the front panel.
- Take the macarons out of the oven and let them cool completely on the baking tray before trying to remove them.
- If they stick to the parchment or silicone mat, they likely needed a bit more bake time.
Next time, try adding 1–2 more minutes in the oven to help them fully set.
Assemble the Salted Caramel Macarons
Fill & Stack the Macarons
Time to bring all those beautiful components together! This part is super satisfying—like matching puzzle pieces but way more delicious.
- Pair up similar-sized macaron shells.
- Fill a piping bag with salted caramel buttercream.
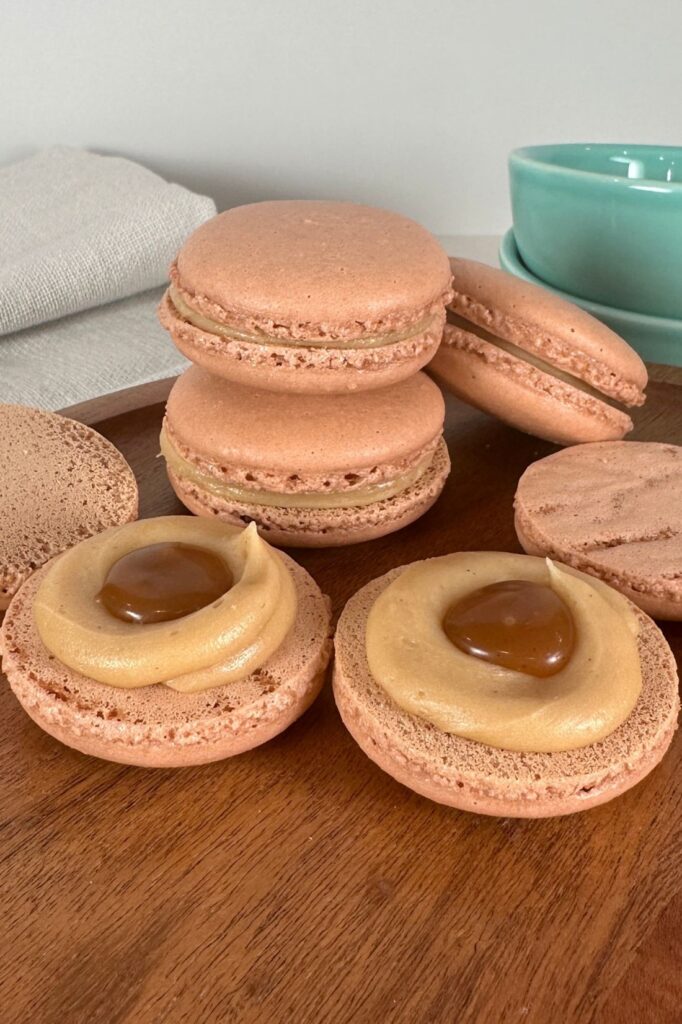
- Pipe a ring of buttercream on one shell, leaving a space in the middle.
- Pipe or add a small dollop of caramel sauce in the center of the ring.
- Top with the second shell and gently twist while pressing down to sandwich.
- Wipe off any caramel that may spill over the sides.
Maturing the Macarons
The texture of macarons improves after resting. This is called “maturing” and helps the filling soften the shells just enough for that perfect chewy bite.
- Place macarons in an airtight container.
- Refrigerate for at least 24 hours (up to 48 for even better texture!).
- Bring to room temperature for 20–30 minutes before serving.
Storage Tip
Macarons can be refrigerated up to 5 days or frozen (filled!) for up to 1 month. Let thaw in the fridge overnight, then bring to room temp before serving.
Save & Share This Salted Caramel Macarons Recipe
These macarons are a showstopper—don’t forget to save this post so you can come back to it again and again. Share your macaron creations with me on Pinterest or tag @bykrissyann on Instagram!
Ready to get started? Below you’ll find my full salted caramel macarons recipe, complete with homemade caramel sauce, buttercream, and shell instructions.

Salted Caramel Macarons
Ingredients
Salted Caramel Sauce
- 227 g water (1 cup / 8 oz)
- 490 g granulated sugar (2 1/4 cups / 17.25 oz)
- 1 Tbsp light corn syrup (optional)
- 454 g heavy cream, warmed (2 cups / 16 oz)
- 2 tsp sea salt
- 1 tsp vanilla bean paste
Salted Caramel Buttercream
- 227 g unsalted butter, softened (1 cup / 8 oz)
- 454 g powdered sugar (4 cups / 16 oz)
- 454 g thick caramel sauce (from recipe above) (2 cups / 16 oz)
Macaron Shells
Macaron Paste:
- 250 g almond flour
- 250 g powdered sugar
- 100 g egg whites
Italian Meringue:
- 250 g granulated sugar
- 75 g water
- 100 g egg whites
- 1/4 tsp salt (optional)
Instructions
Salted Caramel Sauce
-
Add sugar, water, and corn syrup to a saucepan. Do not stir.
-
Cover and heat on medium until boiling. Remove lid.
-
Cook until the sugar turns a rich amber color.
-
Carefully pour in the warm cream a little at a time (it will bubble).
-
Stir in salt with the cream. Remove from heat and stir in vanilla.
-
Let cool completely before using.
Salted Caramel Buttercream
-
Beat softened butter until light and fluffy.
-
Add powdered sugar and thick caramel in alternating additions, mixing well after each.
-
Whip until smooth and pipeable.
Macaron Shells
Prep:
-
Wipe all tools and bowls with white vinegar to remove grease.
-
Sift almond flour and powdered sugar into a large bowl.
-
Add egg whites and mix to form a thick paste. Add gel food coloring if desired.
Make the Sugar Syrup:
4. Add sugar and water to a saucepan. Do not stir.
5. Cover and heat over medium until it boils, then remove lid.
6. Heat until it reaches 240–248°F (adjust for elevation).
Whip Egg Whites:
7. Begin whipping second batch of egg whites on low speed.
8. When syrup is 10°F from target, increase speed to medium-high.
9. Whip to soft peaks.
Make the Meringue:
10. With the mixer on medium-high, slowly pour syrup down the side of the bowl.
11. Increase to high and beat until glossy stiff peaks form and bowl is just warm.
Macaronage:
12. Add ⅓ meringue to paste and mix to loosen.
13. Gently fold in remaining meringue in two additions until batter flows in thick ribbons and forms a figure 8.
Pipe & Rest:
14. Transfer to a piping bag with a round tip (#10 or #12).
15. Pipe onto parchment or silicone mat. Tap tray to release air bubbles.
16. Let shells rest 20–45 minutes until matte and dry to touch.
Bake:
17. Bake at 285–300°F for 12–15 minutes. Shells are done when they no longer slide on their feet.
18. Cool completely before removing from tray.
Assemble the Macarons
-
Pipe a ring of buttercream on one shell.
-
Fill the center with a small dollop of caramel sauce.
-
Top with second shell and gently twist to sandwich.
-
Store in an airtight container in the fridge and mature for 24 hours.
-
Let sit at room temperature for 20–30 minutes before serving.
Notes
- Macarons taste best after maturing for 24–48 hours.
- Filled macarons can be frozen for up to 1 month.
- For more step-by-step instructions and visuals, visit the full post above.